GF: Hot Air Candy
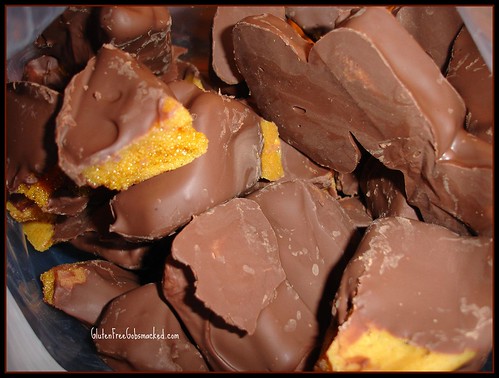
You’ll have to pardon the image today. I took a picture of the candy already in a baggie on the way to go bowling with the foreign exchange kids from school. It was their holiday treat/social and I was bringing them a bit of my family/home.
……………………………………………………………………………………….
Here’s the deal:
Every Christmas my husband’s office (all women + him) have a Holiday Cookie exchange.
His first year working there, a couple ladies pulled him aside and assured him that while they make cookies to share, as the “man of the office”, he need not worry about that. He could “go right ahead and just buy some to share.”
Never, I repeat, NEVER say that to a man who cooks – and cooks damn well, I tell ya. From the moment his toes hit the front door that year, he was in full scheming mode. He plotted and planned the most delicate and intricate cookies and delivered to each of the ladies their perfect baker’s dozen (one for tasting, ya know) in a beautiful Christmas tin that he had selected and decorated.
Of course, all of them thought I had done this work. That notion was quickly corrected by my love. (Thank goodness!)
The kicker? Not only were the women utterly SHOCKED that a MAN knew how to cook – BUT – *They* had all PURCHASED their cookies that year because time got the best of them.
Boy, did my love have a hoot and a holler over that whole scenario. Karma can be painful, huh?
Needless to say, every year since, the stakes have been raised. I am convinced the stakes have gotten higher because he threw down the gauntlet that year with gorgeous stained-glass GLUTEN-FREE sugar cookies (oh yea… he’s the MAN!). All of those gorgeous cookies were tucked neatly – with tissue – into cute little tins too.
Seriously. This man knows how to make a challenge.
The problem? My GOD making 12 dozen gluten-free cookies can be a royal pain in the butto.
Last year, I waited too long to pull it all together. (I began helping the first year with packing the cookies, but since then, it’s been a team effort. It’s fun!)
Last year, I started at about 7:30PM the night before. I swear it was like a junior high Science Fair project that I had spaced until the night before it was due. The worst part was that I was planning to make meringues. No problem – usually – but in this case, karma came back to take a bite and the meringues were the ugliest things I’ve ever seen/made/tried to eat in my life. They were NOT to be served. Out to the store again, and my love took over. He made the tastiest almond cookies (a la English tea cookie). Saved.
This year? This year, I think we’re going to make hot air. Why? Well, why not! It reminds me of being with my sisters at the cabin – or well… I should restate that.
It reminds me of a white candy box and sneaking bites and bites.
It reminds me of 4th of July parades, fishing, swimming, visits from my parents, and life.
Where I grew up and spent my summers, there is a candy store that makes the best to-die-for hot air candy ever. This is an attempt to recreate that here in the PNW.
It’s an easy recipe to follow. Very few ingredients. It’s very helpful to have a functioning candy thermometer (mine didn’t work…. found out a bit late) but you can test the candy by dipping/dripping it into cold water.
Some call this Angel Food Candy.
I think we should just call it TASTY!
Hot Air Candy
Candy Ingredients:
1 cup sugar
1 cup brown rice syrup or corn syrup
1 Tablespoon apple cider vinegar
1 Tablespoon baking soda
Topping Ingredients:
1 bag Ghirardelli semi-sweet chocolate chips
1 1/2 Tablespoons vegetable shortening (like Crisco)
Directions:
- Line a 9 x 13″ pan with parchment paper. Cut enough paper so that the paper goes up all 4 sides of the pan and overlaps the edges a bit. If you prefer, you can also butter the sides/bottom of the pan instead.
- In a deep pot over medium heat/flame(I use a deep, thin stock pot), stir together sugar, rice or corn syrup and vinegar constantly until the sugar has dissolved.
- Continue cooking over a medium flame until mixture reaches 300F and/or mixture forms brittle strands when dripped into cold water.
- Remove mixture from heat. Working quickly, stir in or whisk in the baking soda. Do NOT continue to stir once the baking soda has been evenly distributed.
- Pour into prepared pan – but don’t scrap too much of the dense, stickier stuff from the sides into the pan.
- Allow to cool completely before breaking into pieces. Candy will break easily when tapped with the bottom of a glass or a meat tenderizer, etc.
- Prepare chocolate when the candy is cool and ready to be dipped.
- To prepare the chocolate,in a doubler boiler – OR in a metal pan resting over hot water on the stove (I have a pan that fits neatly into a sauce pan with the bottom dipping in to water easily) – melt chocolate and shortening together while stirring constantly.
- Keep the chocolate warm (shut off the heat but leave the bowl on top of the warm water), dip the candy pieces one by one into the chocolate and then set side on parchment paper to cool/harden,
Candy will keep well for a week or more if stored in a cool place within an airtight container. Store candy in decorative tins for hostess/host gifts (or cookie exchanges and neighborly gifties) or in Ziplock baggies and bring it to a gathering of area high school students.
Happy Candy Making!
-Kate