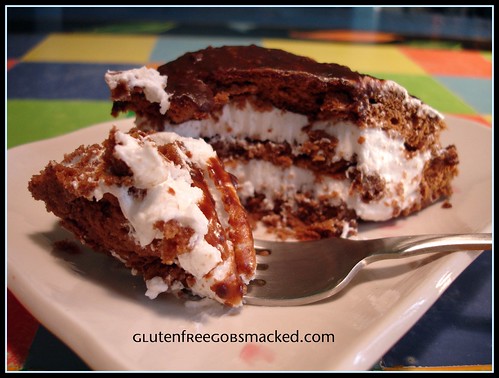
Want a bite? A flourless (GF) sponge cake with a creamy center
So, sometimes you don’t have to work so hard to make your gluten-free dreams come true.
In fact, it just takes a bit of surfing.
Take for example my bizarre craving for a Hostess Ho-Ho. I honestly don’t think I’ve eaten a Ho-Ho in 20 years (Gad! I’m getting OLD when I can say that, huh?) Suddenly at the end of the week, I found myself craving the impossible gluten-filled, preservative-festival Ho-Ho.
What in the world is going on with me?
Nope, I’m not pregnant. I *wish*! (That’s a whole other story… and one that has us putting every penny away for adoption that we can!)
Instead, I decided to try to make my own. However, this craving hit me on Thursday and I have been busy as heck getting things ready for Final Exams at school. Make up a new recipe? Nope. Not on Thursday Night. No way. I just wanted a stinkin’ Ho-Ho for goodness sake, not an expedition into baking.
So I turned to the internet and my problems were solved. I found an excellent flourless chocolate sponge cake at Joy of Baking. While most of the recipes there have the potential of causing giant green-eyed baking monsters to climb on my shoulders and peer at the pictures with me, I tend to go there when I am in need of inspiration. And thank goodness I found it!
I then used a whipped filling recipe that was a piece of cake and fairly well-known by many.
I didn’t create either of these recipes. I just put them together, rolled up my giant Ho-Ho and sliced it into individual serving sizes. After all, what’s a chocolate-eating, Ho-Ho craving gal to do when her Love doesn’t eat chocolate or sweets? (He’s just plain wrong, I know. LOL) I did the only thing I could think of! I packed up a family pack for Mohammed and Gaby and some smaller single servings for students who are GF or have family who is GF. And I had two pieces left over.
Yes. My weekend was Ho-Ho filled. Deliciously, thank you. I think I’m done ever craving a Ho-Ho to be honest. Not just because it’s been 20 years (again- ACK!) but because this homemade version is quite honestly, better. More moist. Easy to make. And I know exactly what the ingredients are.
Here are the recipes.
For the flourless chocolate sponge cake, click here. (Until I get permission from Stephanie to post her recipe here as well, I have only including the link.)
Gluten-free, flourless Ho-Ho
Makes a dozen generous servings.
Ingredients:
Cake:
1 flourless chocolate sponge cake
Whipped Filling:
1/2 cup sugar
2/3 cup shortening
1 teaspoon vanilla extract
1/2 teaspoon orange extract
1/2 teaspoon lemon extract
1/3 cup milk
1 cup powdered sugar
Chocolate Glaze topping:
1 cup heavy cream
1 cup bittersweet chocolate chips or semi-sweet chocolate chips
1 Tablespoon butter
Directions:
- Make the flourless sponge cake. Cover the warm cake with two damp paper towels (wring out all of the water from the towels) to keep the top moist and the cake flexible.
- In a mixing bowl, beat the sugar, shortening, extracts, and milk for 6-7 minutes. It *will* become blended, whipped, and smooth – even though it doesn’t look like it at first.
- Add the powdered sugar and beat again for an additional 5 minutes. The filling will fluff up and become light with this amount of time. Less time and the filling will be dense.
- Remove the paper towels from the sponge cake. Spread the filling across the sponge cake evenly.
- Roll the cake along the long-side. (I used a jelly roll pan with greased (important!) parchment paper to make the sponge cake.) Use the parchment paper to help you roll the cake and make sure that the final roll has the cake resting upon itself to help keep it rolled tight.
- GLAZE: Heat the heavy cream (whipping cream) until almost just at the boiling point – but don’t let it boil.
- Pour the heated cream over the chocolate chips and stir until the chips have all melted and it is smooth.
- Add the tablespoon of butter to the chocolate glaze and stir until well incorporated.
- With the cake resting again on a piece of clean parchment paper in a clean jelly roll pan, pour the glaze slowly over the top so that it drizzles down the sides and coats the sides of the cake evenly.
- Allow the glaze to set overnight on the cake. It will be soft, but not sticky when it is set.
- Cut and serve. (I also cut the pieces before glazing if you want to try that as well.)
Happy Ho-Ho Making!
-Kate