Gluten Free Pepita-powered Bread… oh yeah!
Light, fluffy, easy to make and not loaded with a million calories.
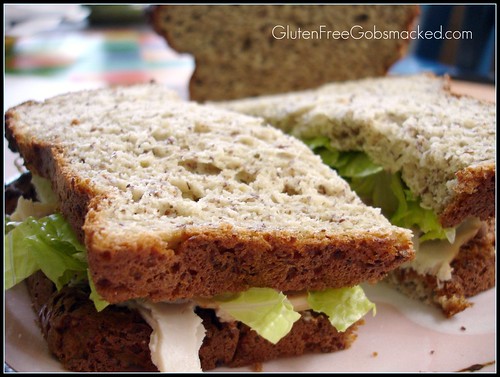
Oh yea. This is my new sandwich bread when we’re not eating wraps.
I ran out of pepitas (pumpkin seeds) Friday. It just added one more thing to the “to-do/to-get” list that was percolating in my head. I was in no rush, but I knew that I would miss them on my salads. When I spied a bag of the raw, dried pumpkin seeds while we were out yesterday, I was quick to toss them in to the mix of to-be-purchased items. And the second I had the pepitas in hand, my brain started trying to figure out what more I could do with them.
When I was a kid, my mom would have us save our pumpkin seeds from carving jack-o-lanterns and we would rinse them, toss them with a little salt and oil and she would roast them. Oh, were those good! I loved munching on the warm, roasted seeds in the cool October evenings. I enjoy them so much that I even saved the seeds from my mini-pumpkins (pie-in-a-pumpkin) to roast. However, I knew that wouldn’t hold me over. I had to pick up more.
Pepitas are actually quite versatile – and healthy. Snacking on the dried/raw pepitas or on the roasted ones is great. Tossing them by the handfuls in to salads, on to soups, or with yogurt for breakfast are also popular ways to munch on the seeds around here. We also like to add ground pepitas to salad dressings, sauces, etc. We’ve even ground them and added spices to use as a seasoned thin coating of “breading” on roasted pork loin or chops. (Ground pepitas, garlic, fennel, salt and pepper are my favorite combination.)
I wondered what these these tasty treats would do to a bread recipe. I had been plotting one that used much less starch than typical GF breads. I wanted to see if the texture would be better without as much starch. To be honest, I wasn’t sure the bread would even hold together. So this weekend I caved to my plot and had to give it a try. And I’m NOT sorry I did at all!
This bread is quite delicious – AND it’s light (!), airy (!!) and flexible (!!!). All of these descriptive terms are the ones I look for in a gluten free bread, ya know. After all, if I am forced to toast it or crumble it in order to “use it”, it’s not really for me. And even my gluten-eating Love thinks this bread is worth it too.
Each slice of bread (53g) has 120 calories, 5g of fat (2g saturated, 0g trans fats), 27mg of salt, 15g of total Carbs, 3g of fiber, 3g of sugar and 4g of protein. Each also has a decent amount of some daily values of vitamins/minerals. Each slice has 2% of your daily Vitamin A and Calcium as well as 7% of the daily recommend intake of iron.
The fiber content is good – as is the low sodium. Now… I just have to work on the calorie count. 🙂 Each of these slices have about the same number of calories that regular gluten-filled white bread has, but these are obviously gluten free and made from gluten-free whole grains.
Whatever the balance, we are enjoying this bread for paninis with our soup and sandwiches for work. I hope you get a chance to try it out as well.
Gluten Free Pepita-powered Bread
Makes one standard 9 x 5 loaf of bread
Nutritional analysis based on 18 slices per loaf (which is what we average)
Ingredients:
1/2 cup raw pumpkin seeds (otherwise called Pepitas)
1/2 cup flax seed meal
3/4 cup millet flour
1/2 cup certified GF oats OR quinoa flakes
1/2 cup tapioca flour
1 1/2 cups water (1/2 cup for proofing the yeast, the last 1 cup is added at the end)
1 1/2 Tablespoons pure GF maple syrup OR agave nectar OR honey
1 1/2 Tablespoons yeast
2 eggs
2 teaspoons xanthan gum
2 Tablespoons brown sugar
3 Tablespoons butter, melted
Directions:
- Warm 1/2 cup of the water (reserve the other 1 cup) to proof your yeast. Do NOT boil nor heat to steaming. Add maple syrup (or agave or honey) and yeast. Stir. Set aside to proof for at least 10 minutes. (Mine proofed for about 15 minutes and almost overflowed the 2 cup glass measuring container!)
- In the bowl of your food processor, dump the pumpkin seeds. Process until evenly ground. Add the flaxseed meal, millet flour, tapioca flour and oats (or quinoa flakes). Process again until evenly combined and oats (or quinoa flakes) have been mostly ground down.
- Pour ground flour mixture into the bowl of your mixer. Dump the proofed yeast mixture over the top. Add the eggs, xanthan gum, brown sugar, and melted butter. Pour in 1/2 cup of the reserved water.
- Mix together on low or medium until the batter is even. Add the remaining 1/2 cup of water. Mix again on low until the batter becomes an even consistency.
- Beat the batter on high for 5 minutes (no longer than 7 minutes).
- Prepare a standard loaf pan by spritzing the bottom and sides/corners with olive oil.
- Pour the batter into the prepared pan and push out evenly with a wet spatula.
- Set aside in a warm place and allow to rise until the dough rises just over the top of the pan (10-30 minutes, depending on your yeast).
- Preheat oven to 350F. Bake bread for 30 – 45 minutes or until it reaches an internal temperature of 205F. (NOTE: Check the bread after 10-15 minutes to see if the top is getting too brown. You may need to cover the top of the bread with a piece of foil draped loosely over while it finishes baking.)
- Remove from the oven and allow to cool undisturbed for 5 minutes. Then remove from the loaf pan and place on a wire rack. (I lay it on it’s side so as not to lose the height.) Allow to cool for 30 minutes before cutting.
Enjoy!
-Kate
PS. This bread would also *look* great with a few pumpkin seeds and oats gently crushed an laid across the top prior to rising/baking.